How to Set Up a Recurring ACH Batch
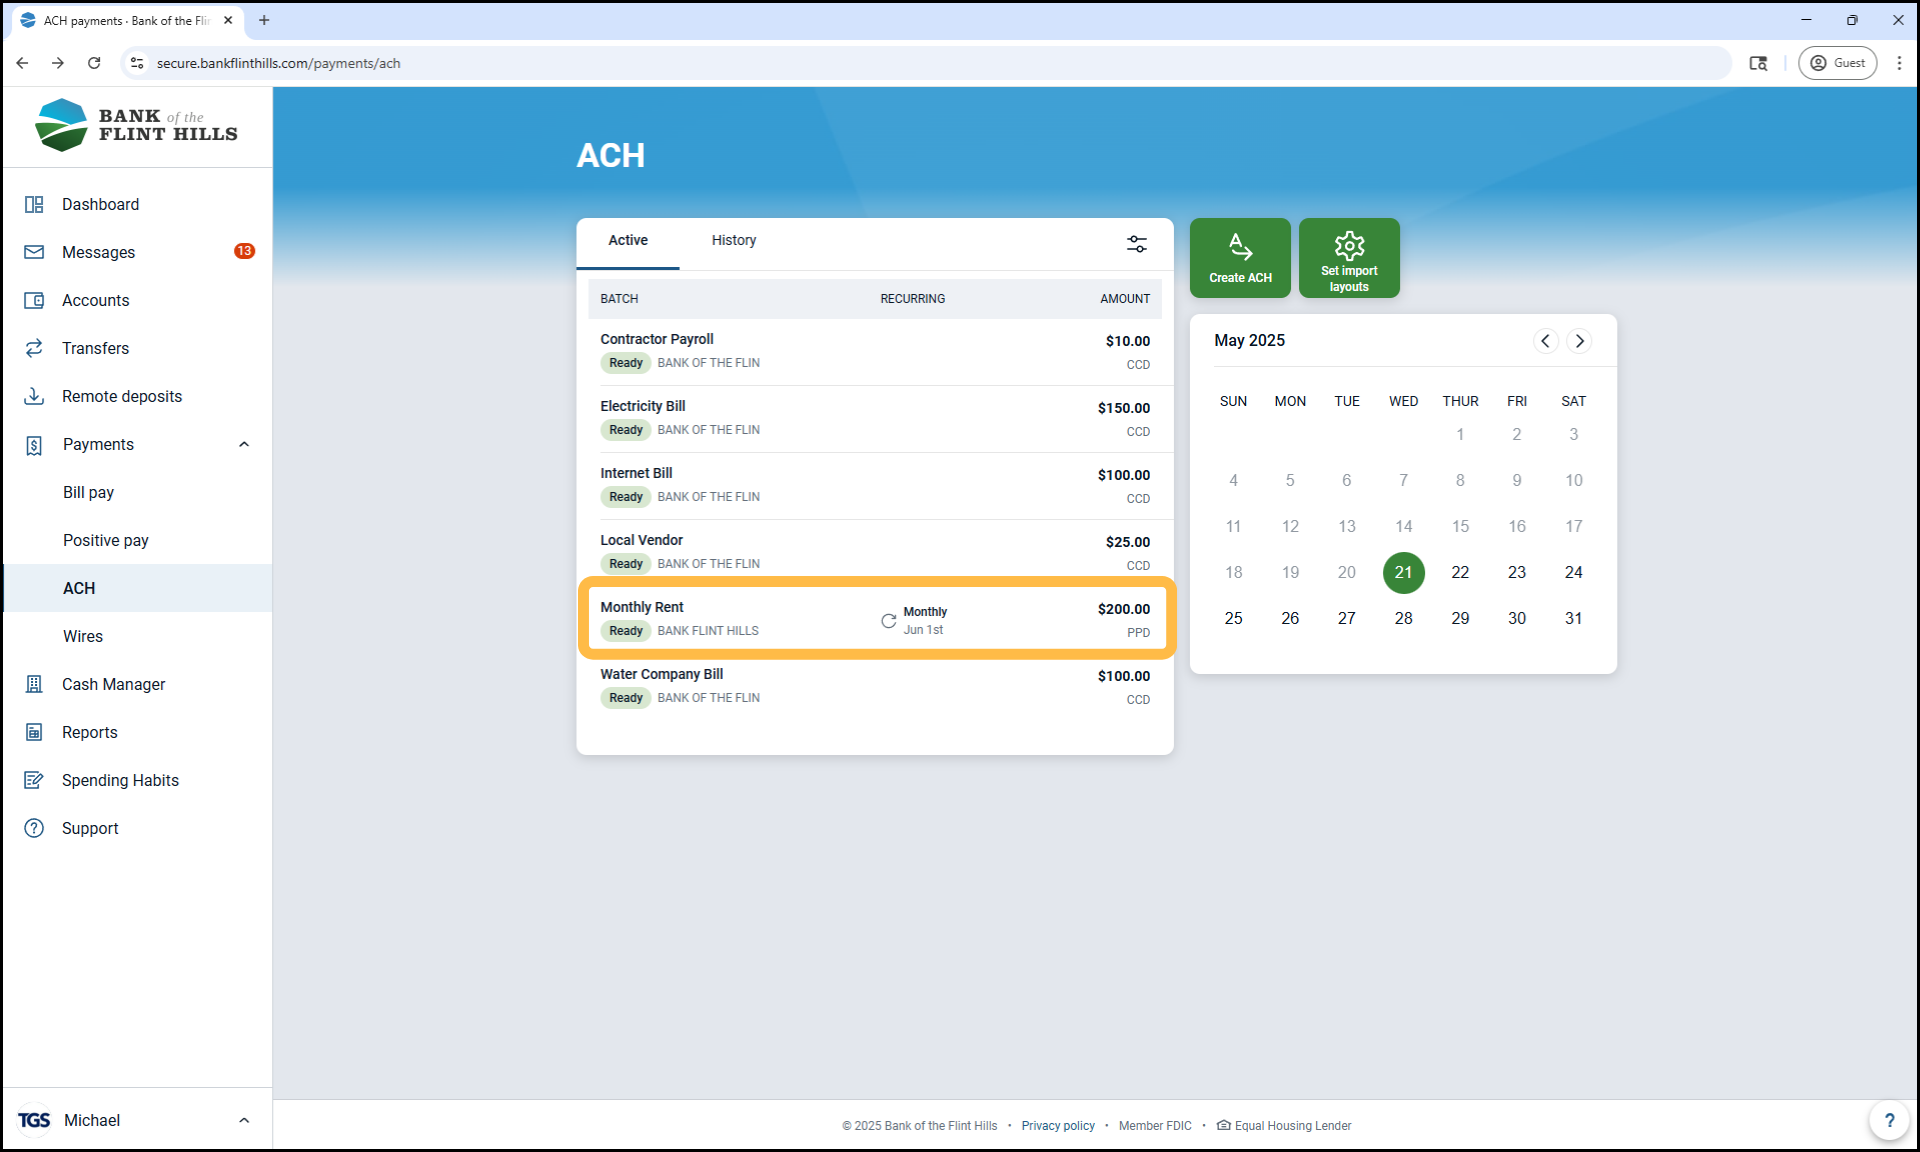
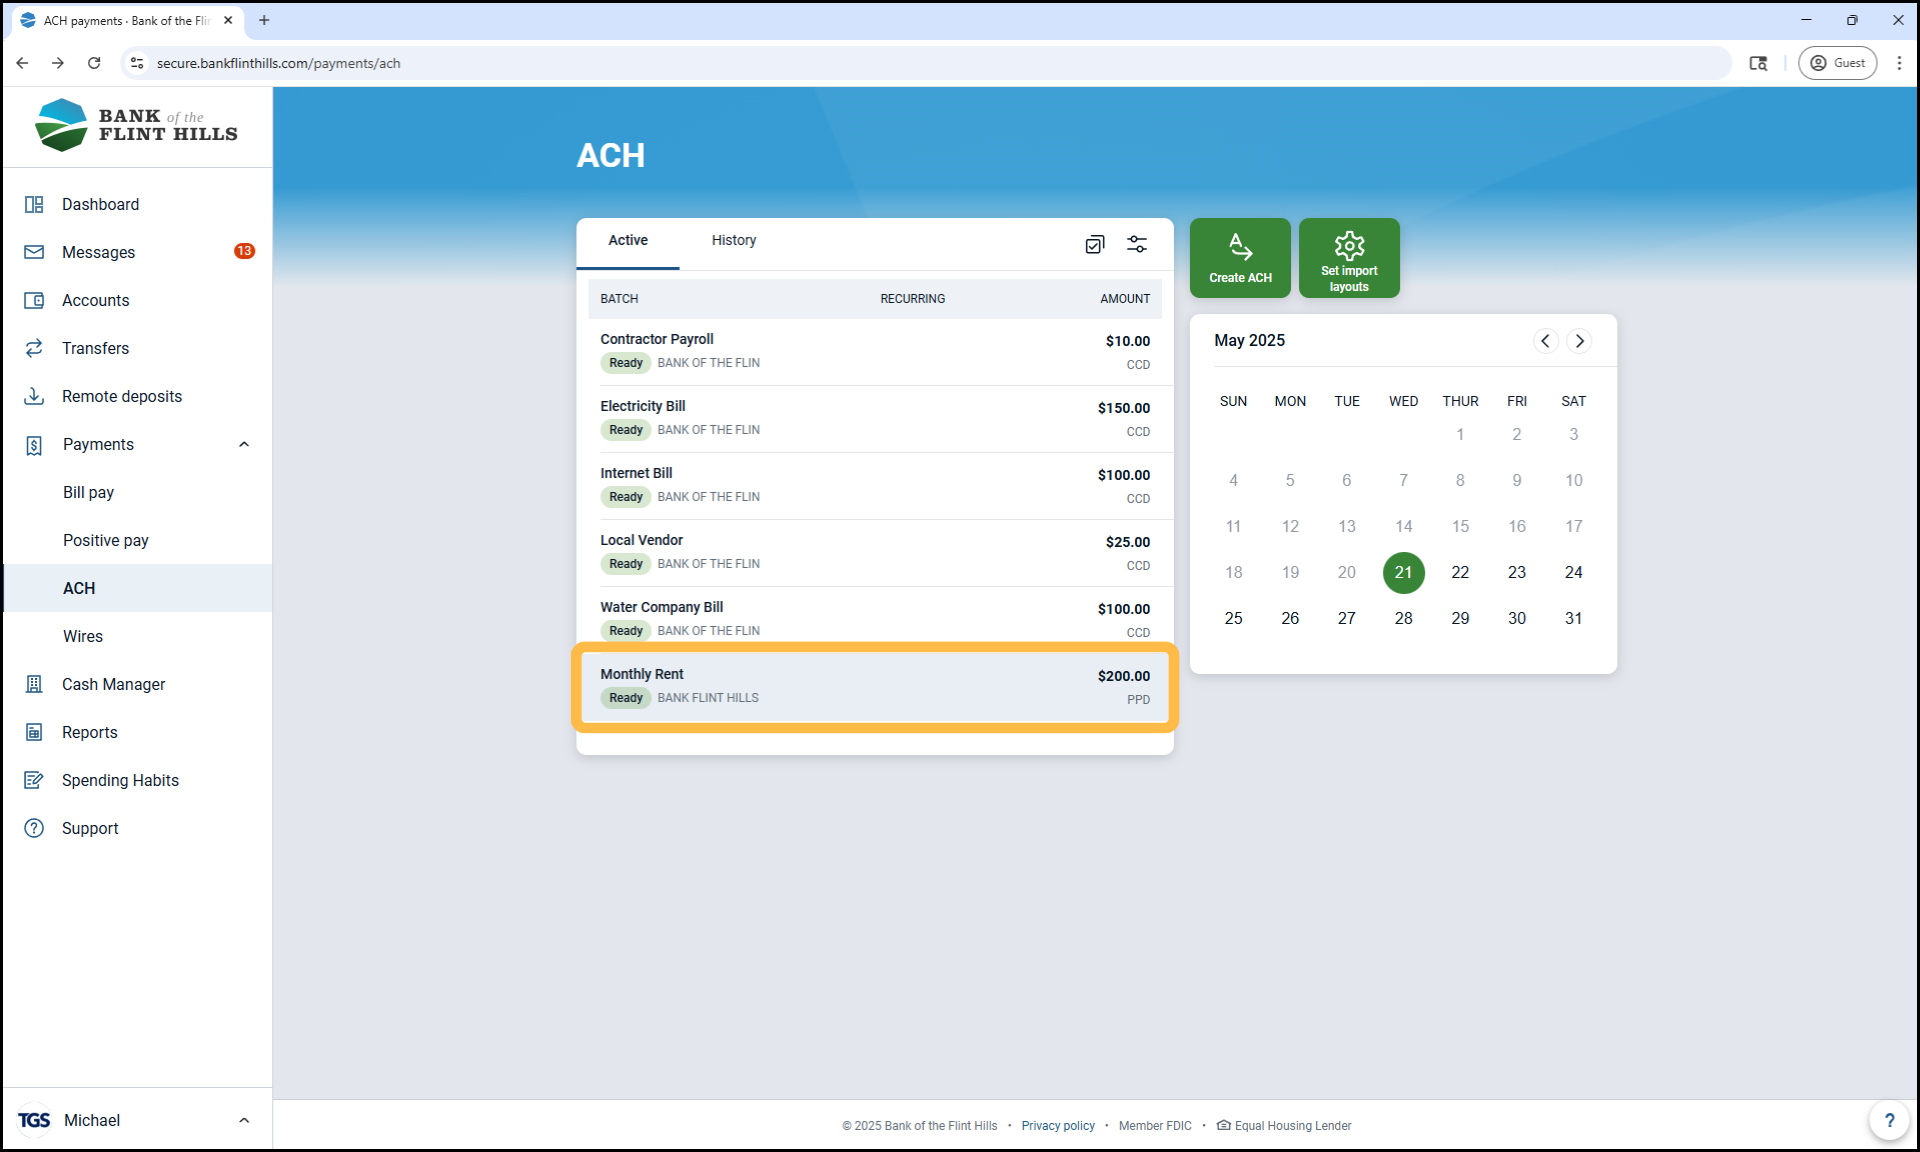
1. Select the batch
Navigate to the ACH menu and choose the batch you'd like to set up on a recurring schedule.
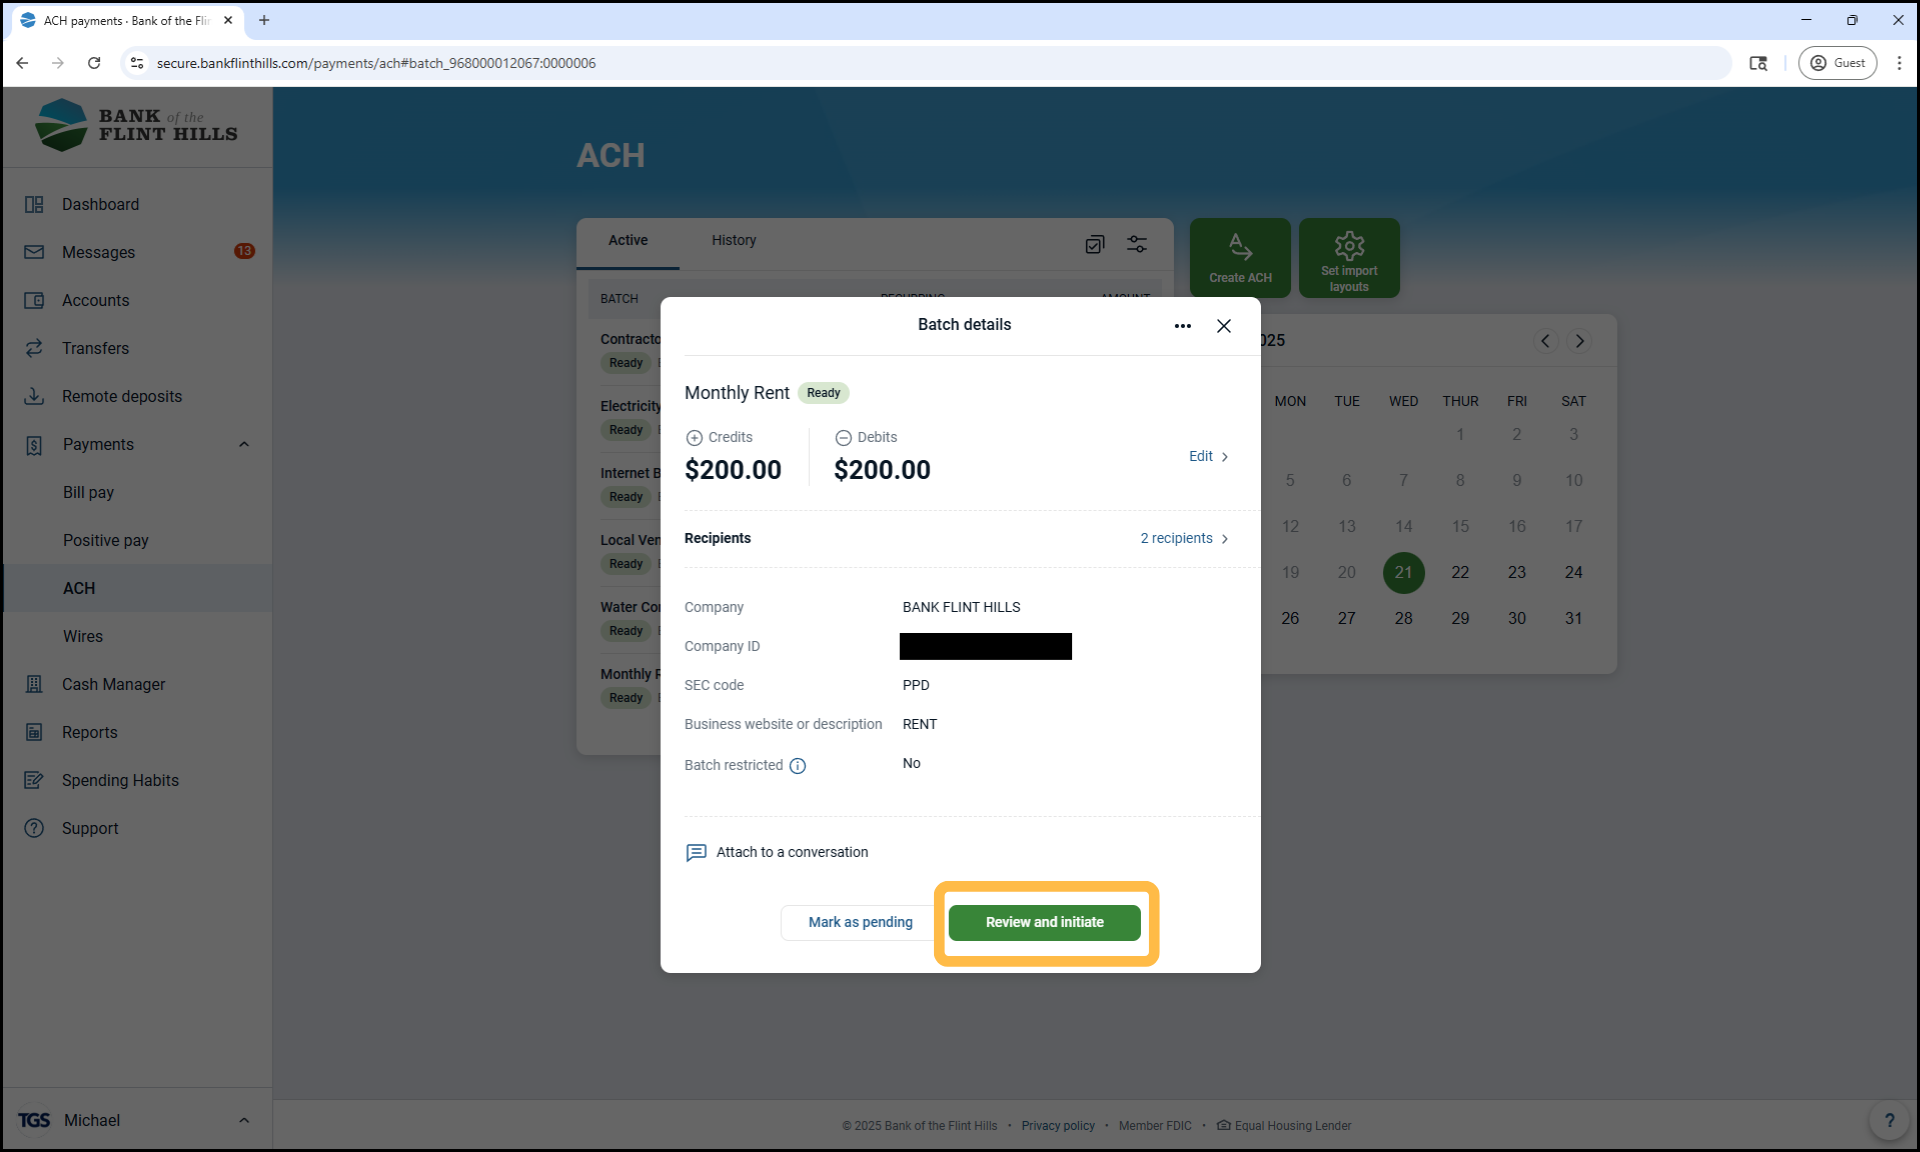
2. Click ‘Review and Initiate’
This opens the Initiate ACH screen for the selected batch.
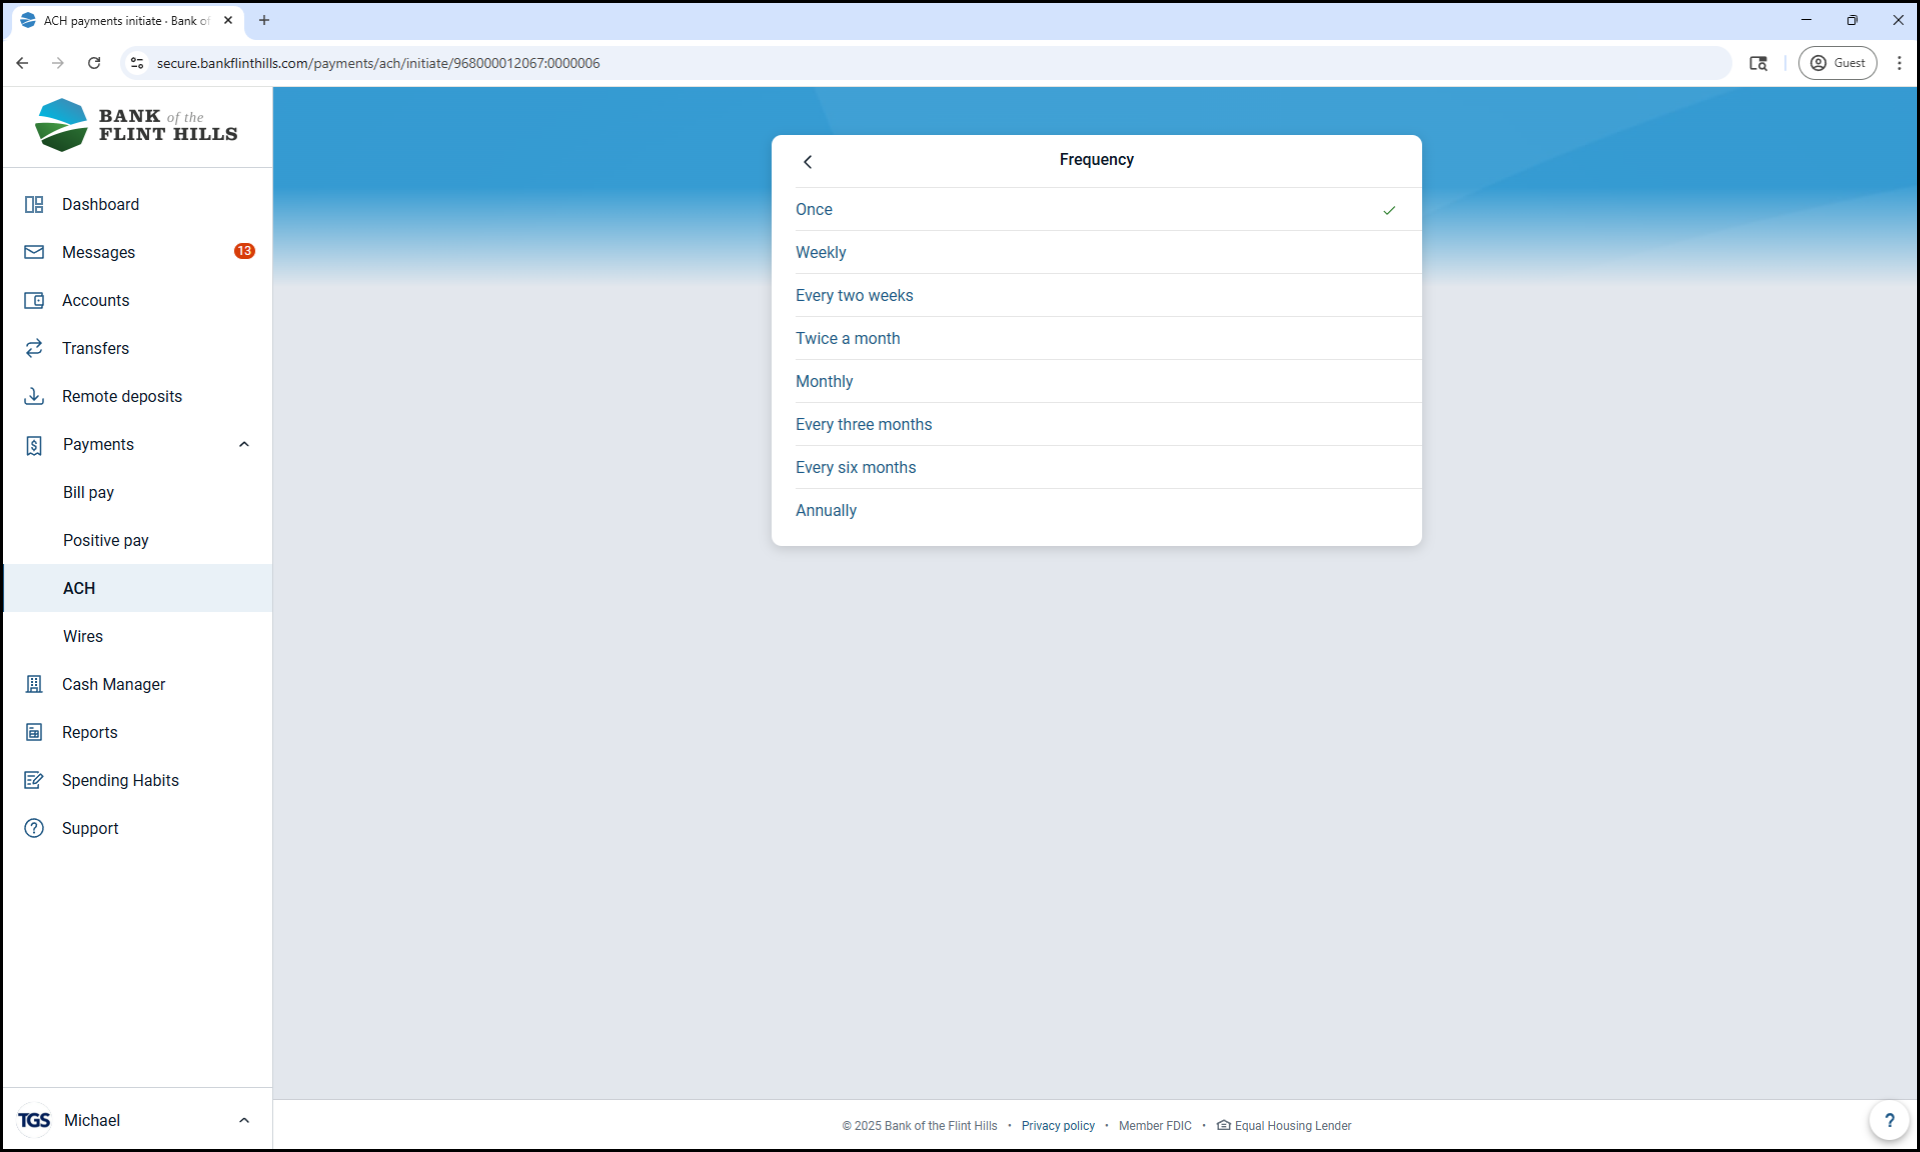
3. Look for the ‘Frequency’ option
If your business is enrolled in Recurring ACH functionality, you'll see the Frequency dropdown.
Note: If the Frequency option is not visible, your business is not currently enabled for recurring ACH batches. Please contact the Business Support Team to get this feature set up.
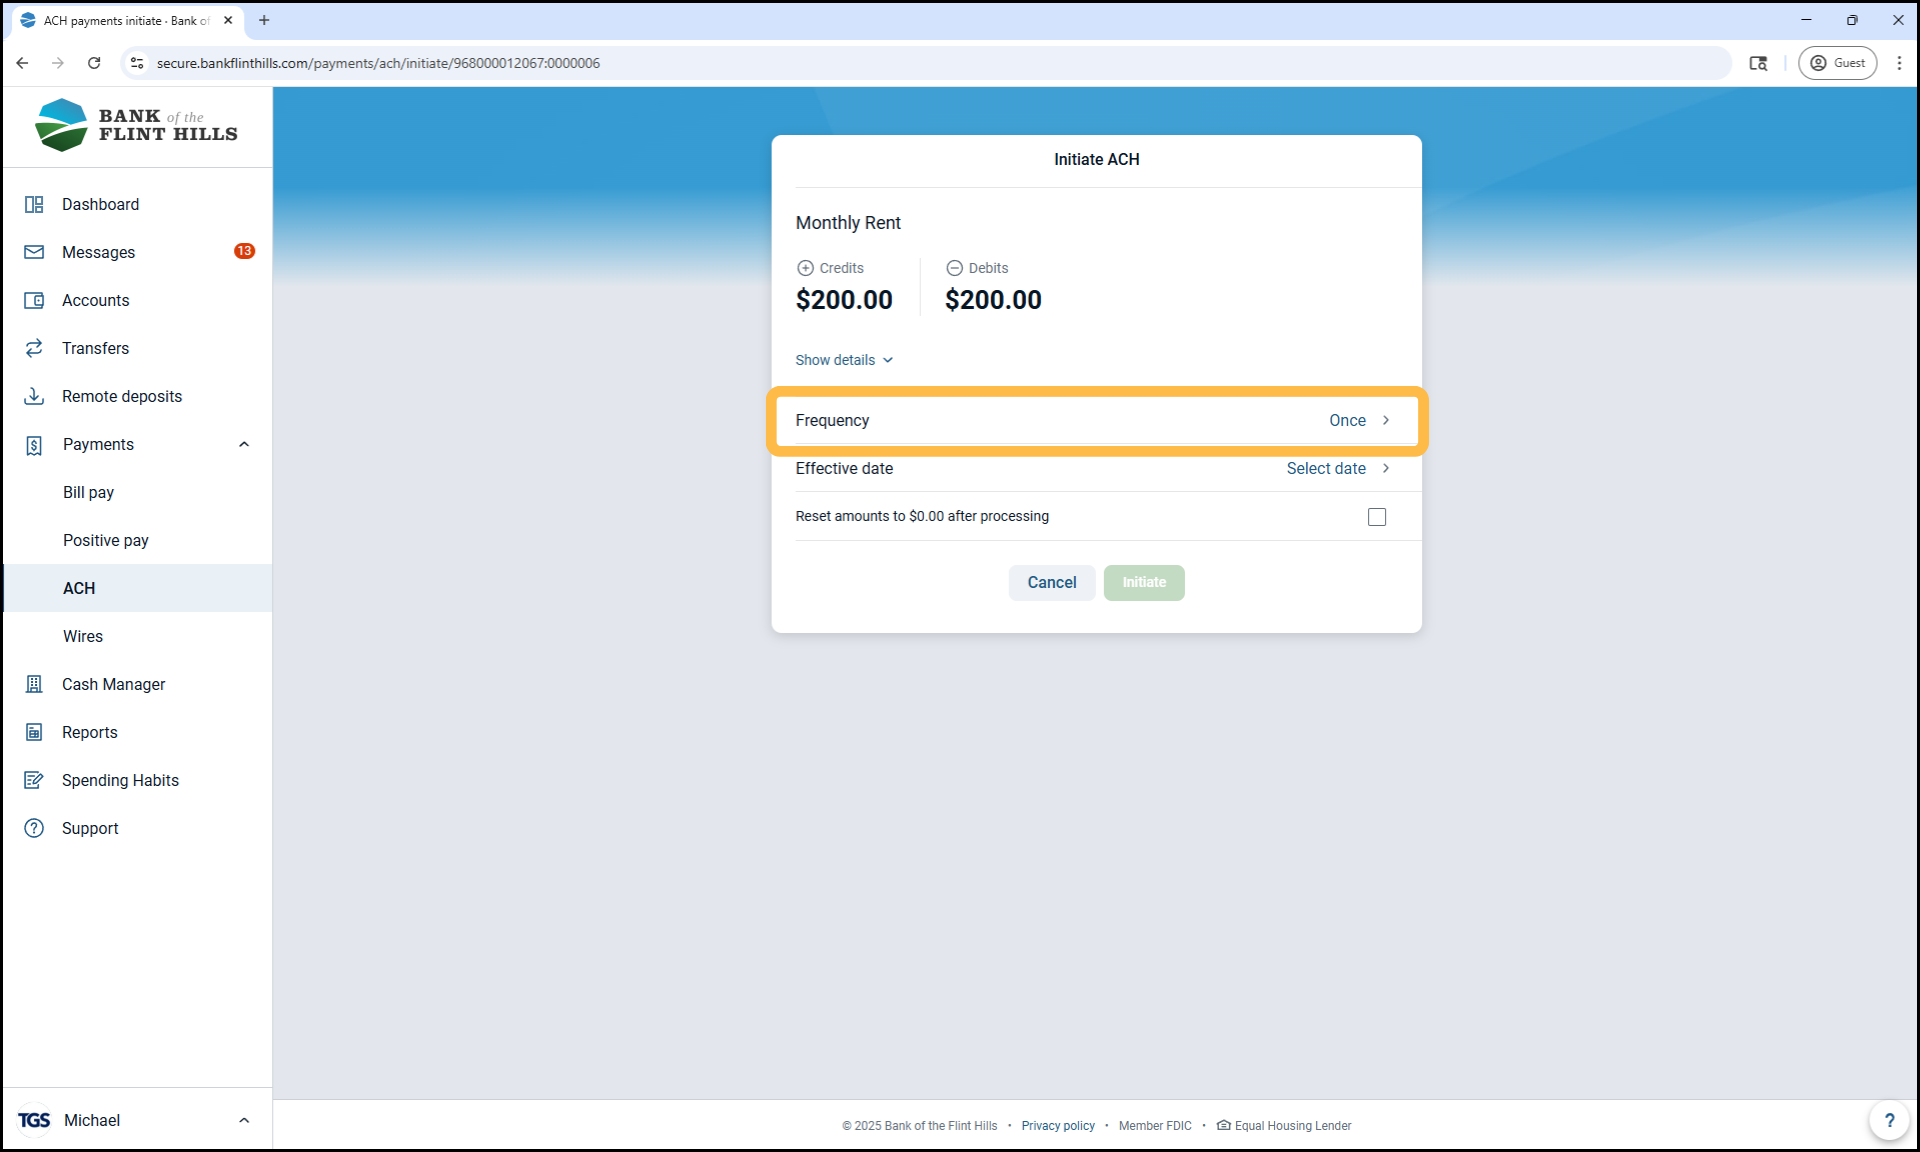
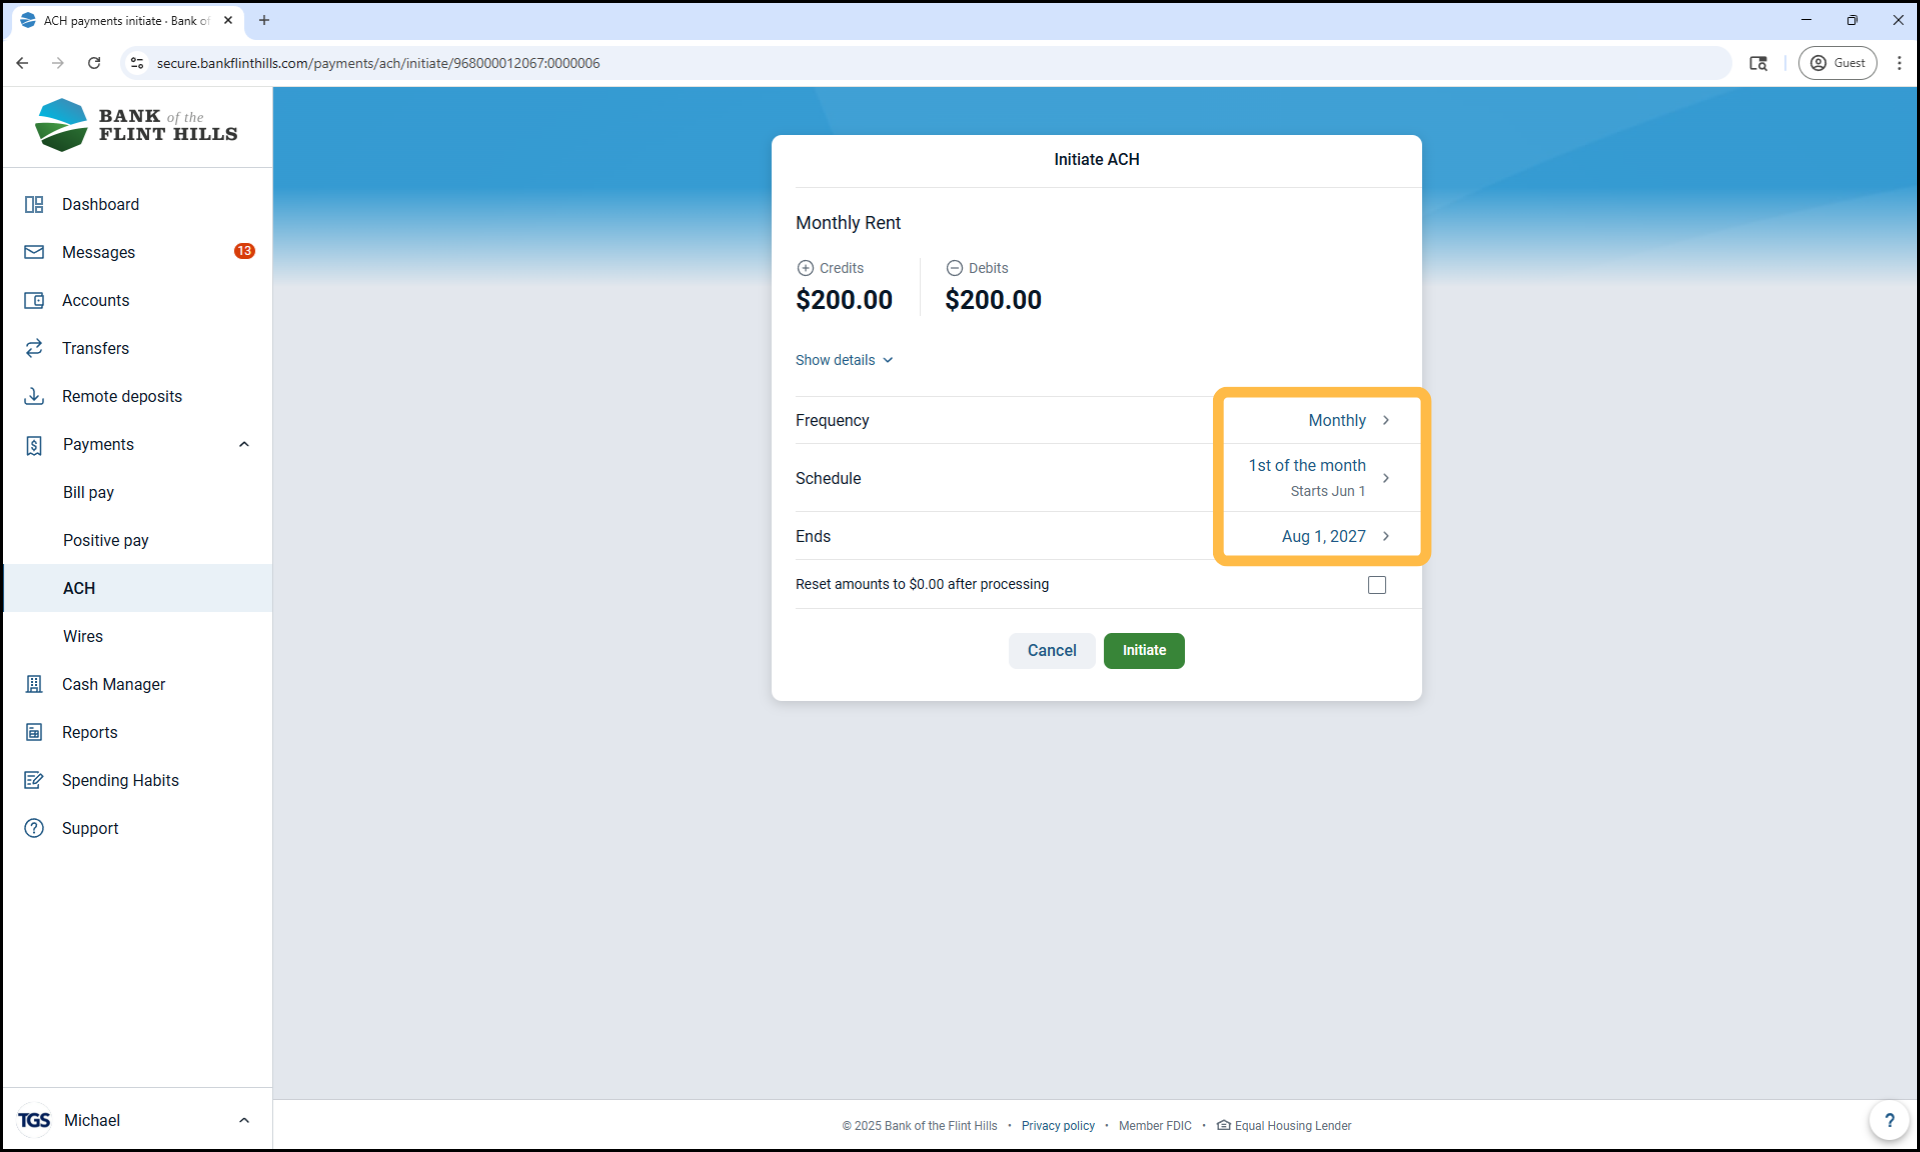
4. Choose a Frequency
Select how often this batch should initiate (e.g., Weekly, Bi-Weekly, Monthly).
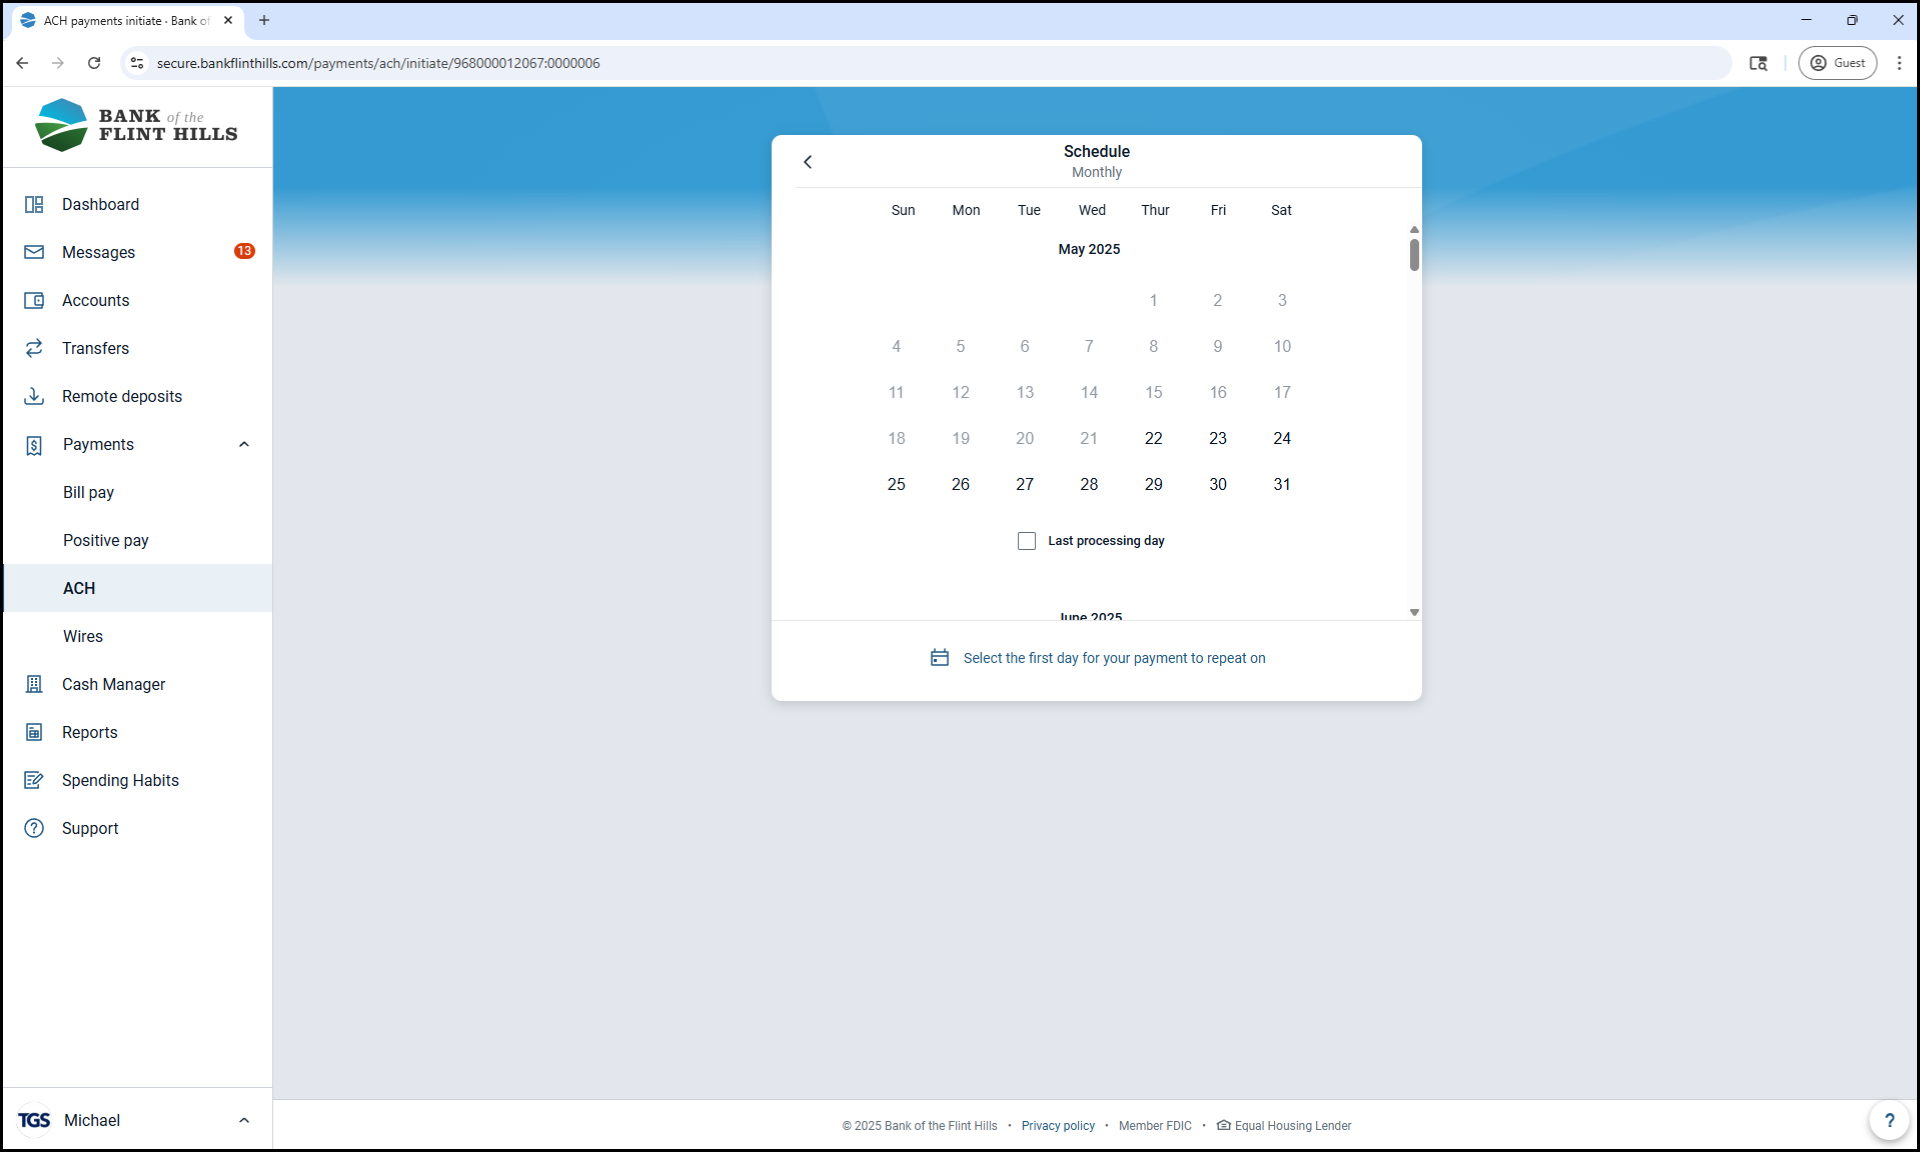
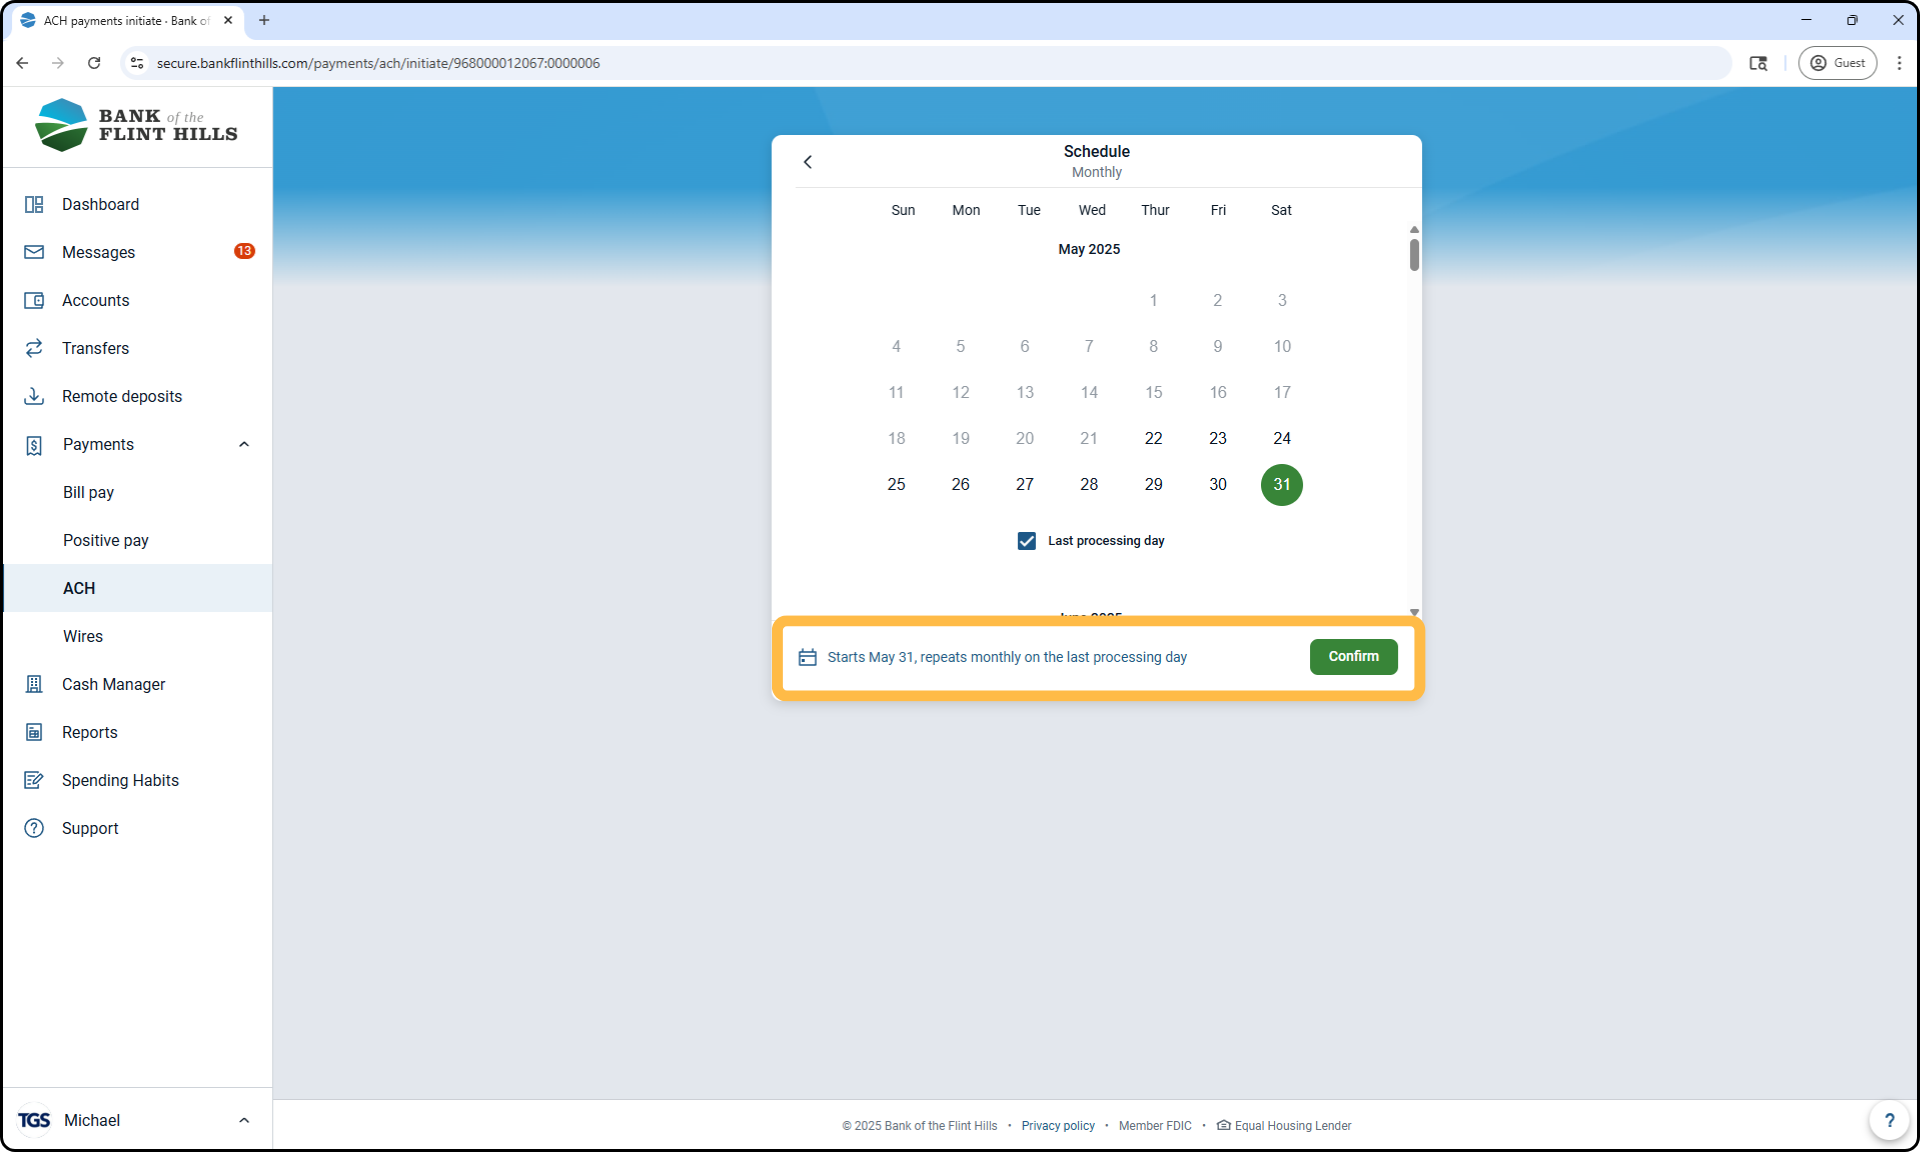
5. Set the Start Date
Pick the date you'd like the first batch to be initiated. This start date will determine the schedule for future batches based on the frequency you selected.
6. Confirm the Start Date and Schedule
A summary of your start date/frequency settings will appear. Review the details, then click Confirm to continue.
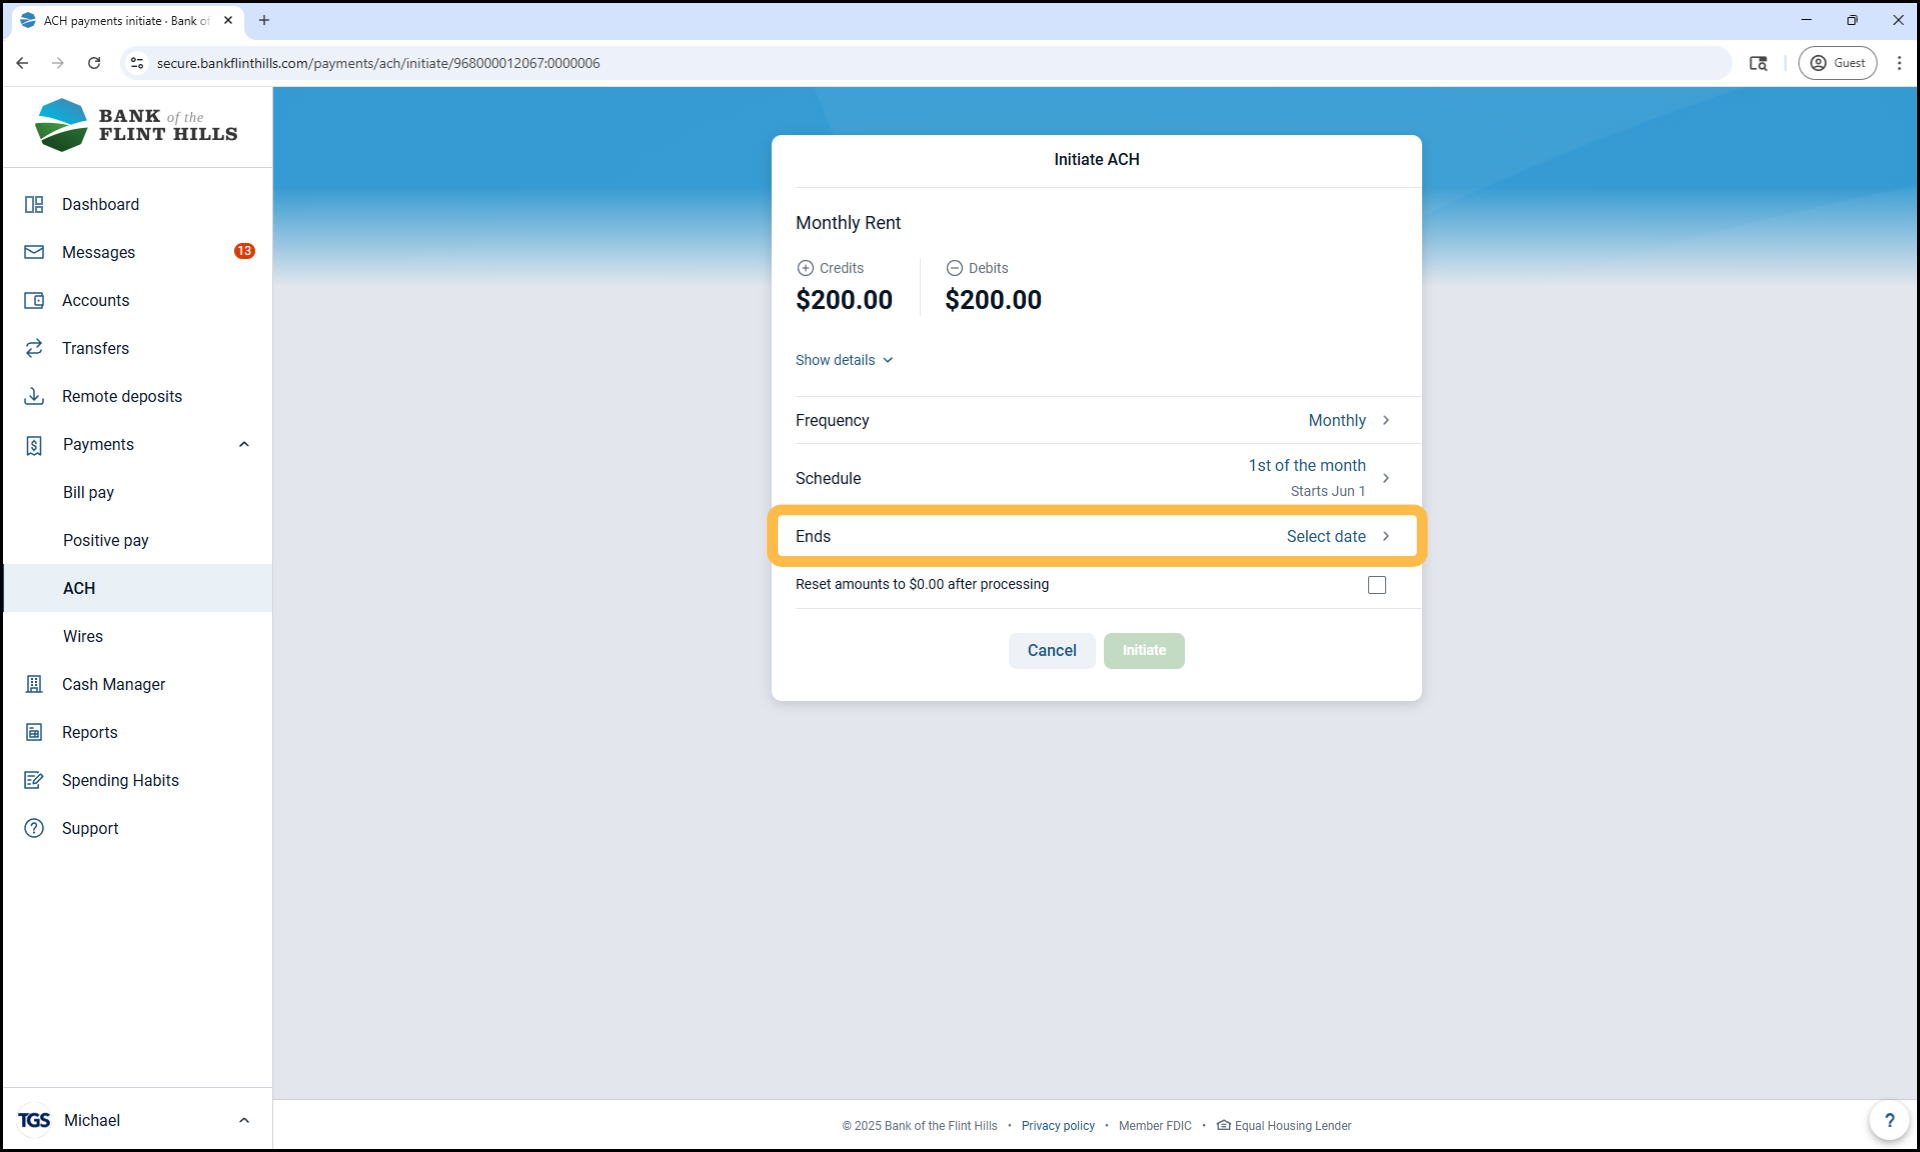
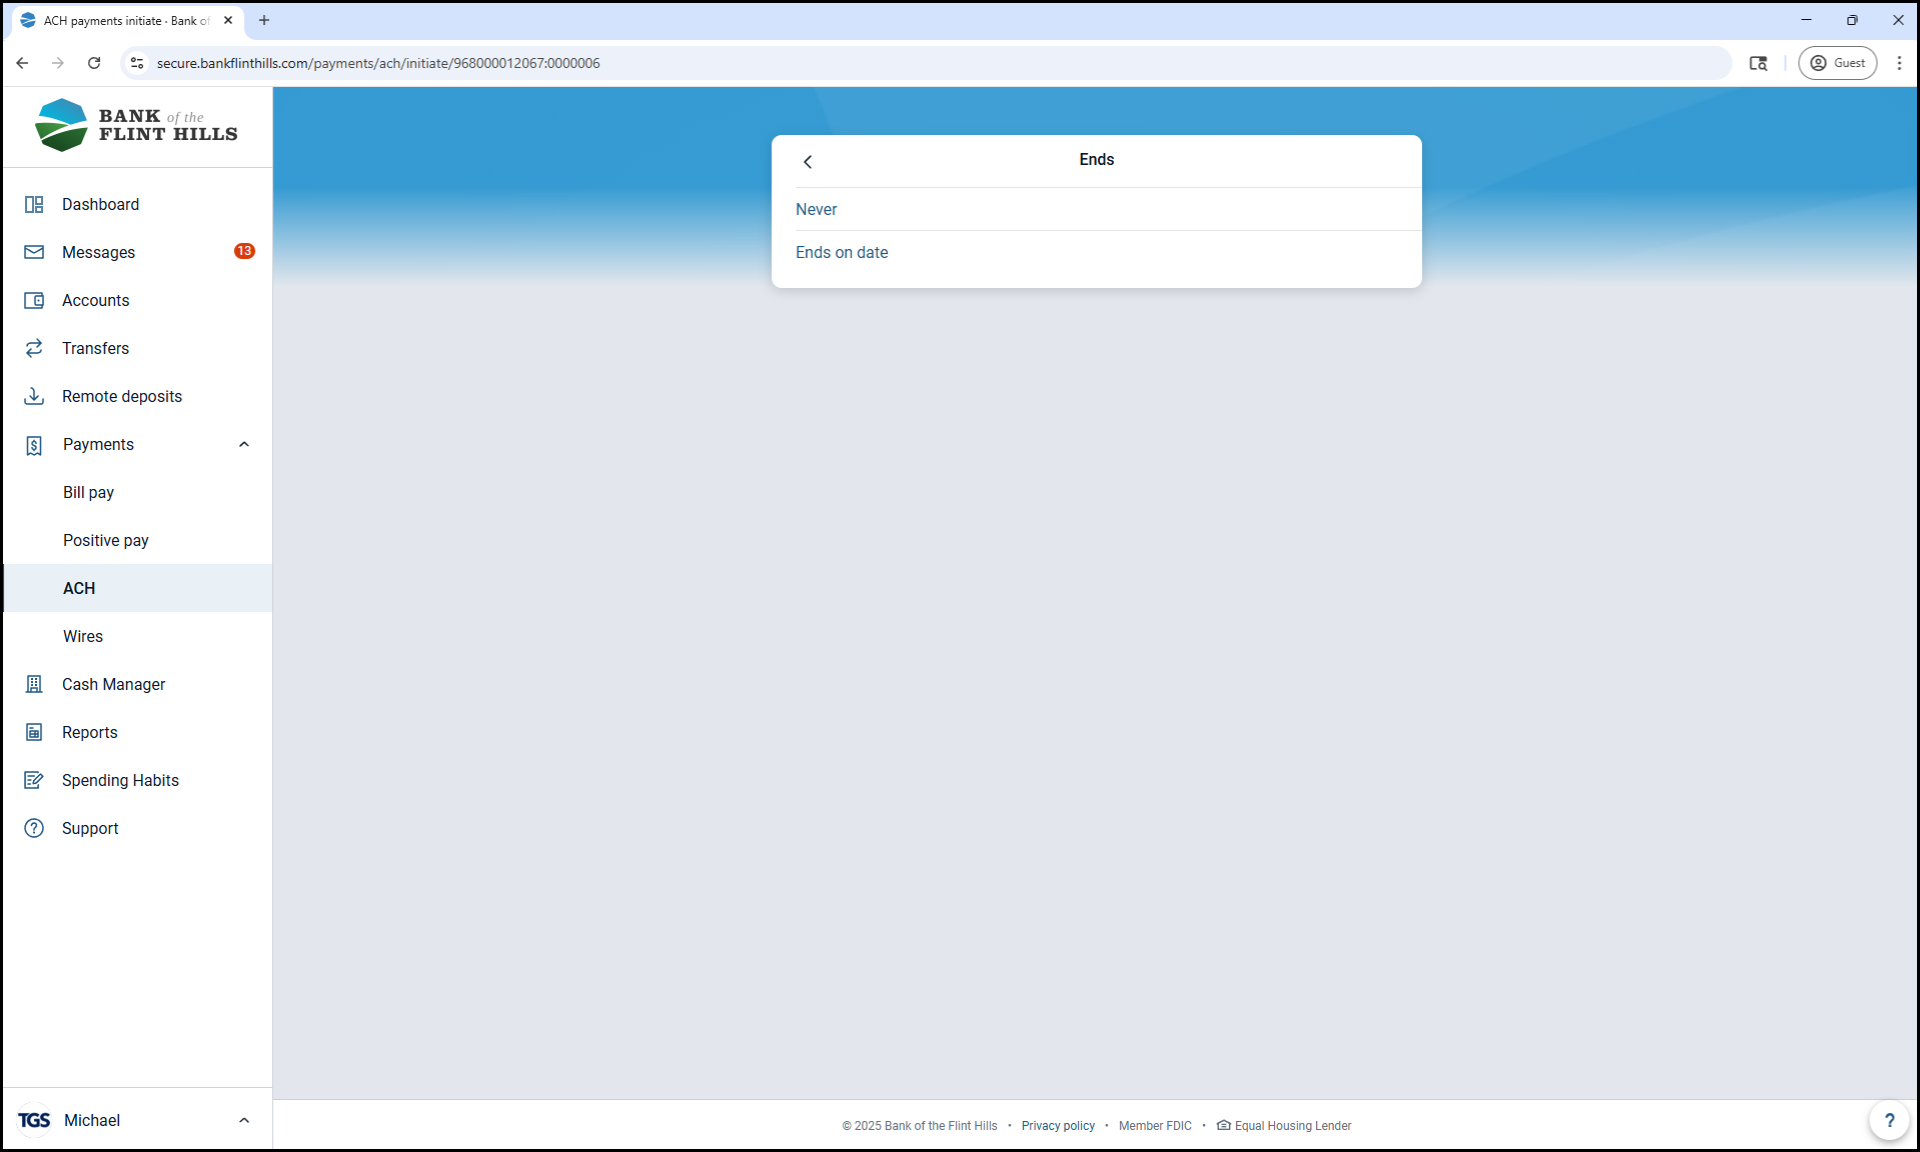
7. Set the End Date
Choose when the recurring batch should stop:
Select 'Never' if you'd like it to continue indefinitely.
Or select 'Ends on Date' to specify the last processing date.
8. Confirm the End Date
If an end date was selected, review the confirmation message and click 'Confirm' to finalize the schedule.

9. Final Review
Double-check the ACH batch details, including:
Frequency
Schedule
End Date
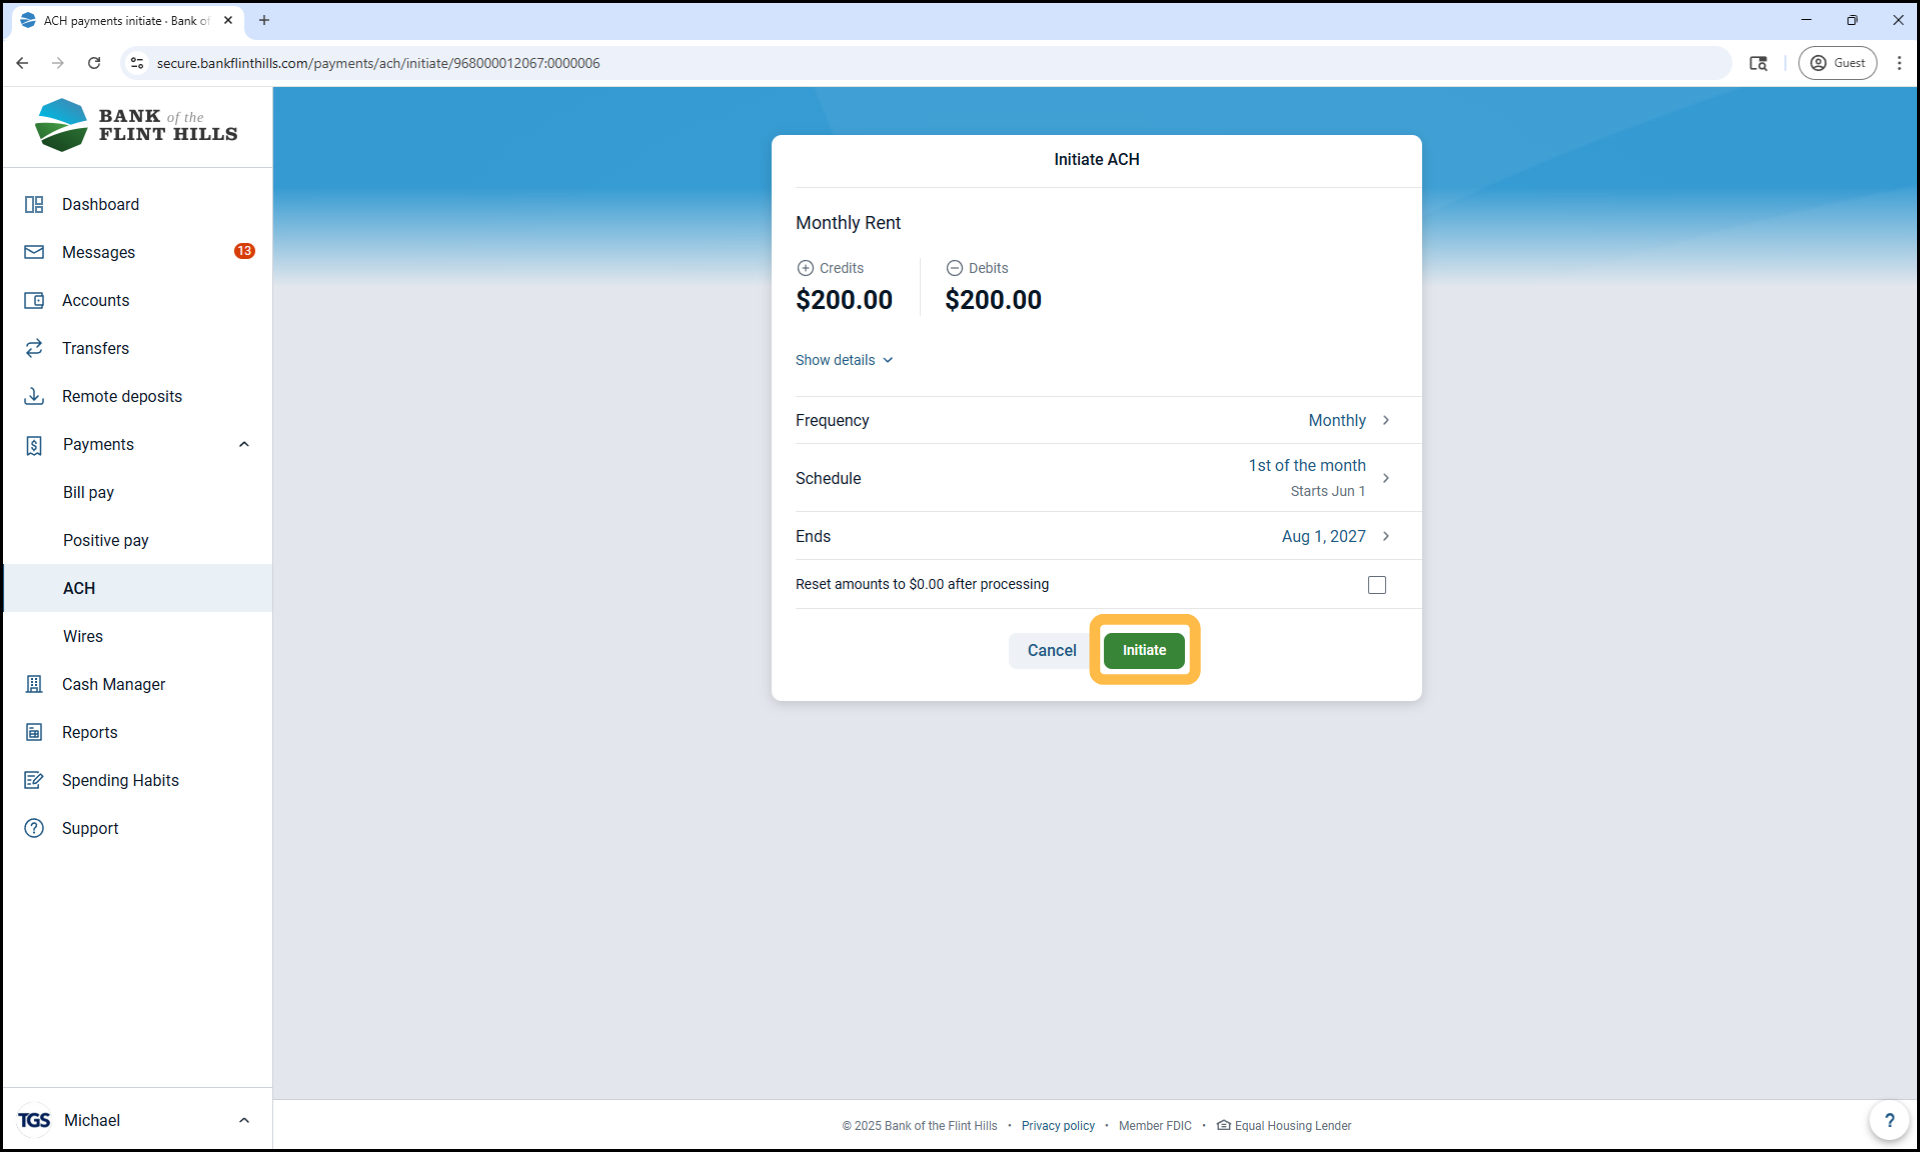
10. Initiate the Batch
If everything looks correct, click 'Initiate'.
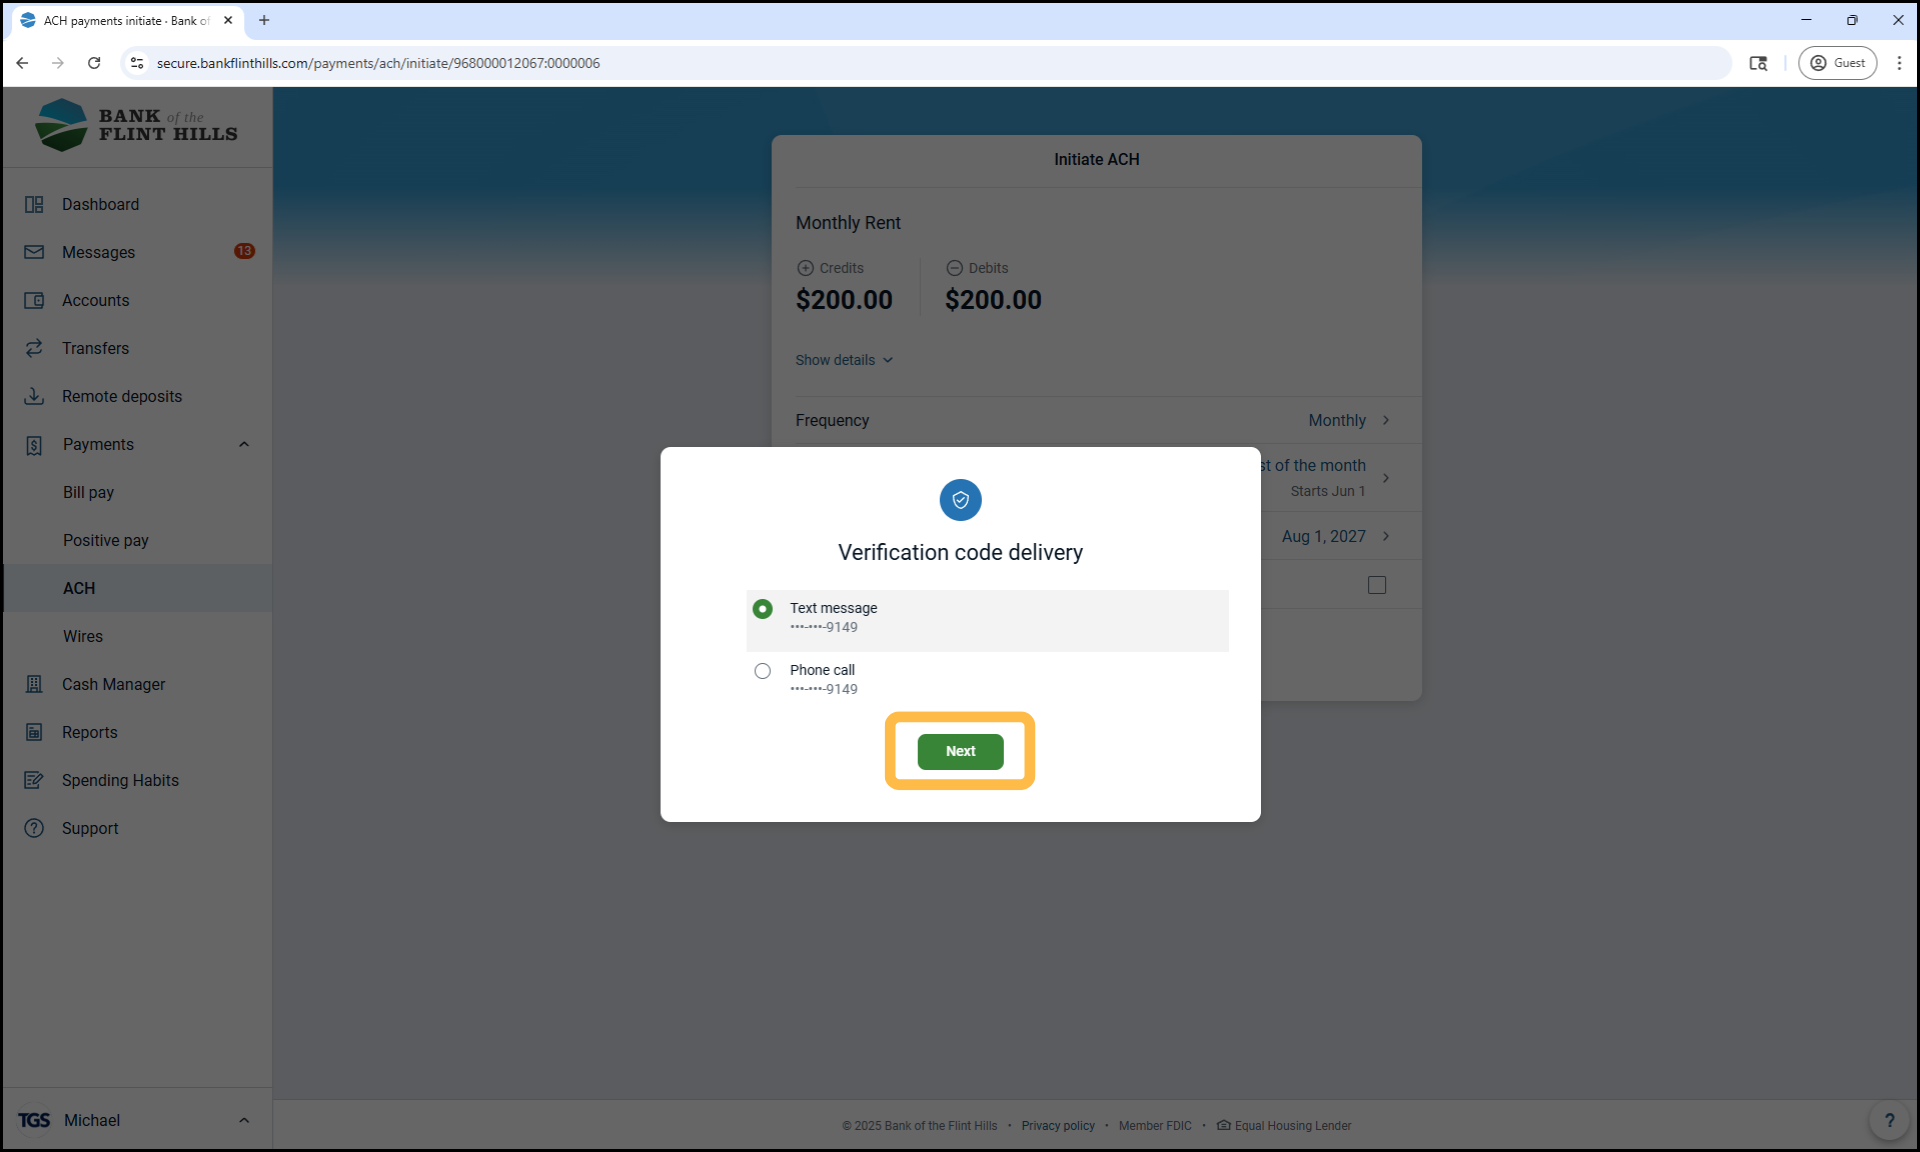
11. Complete the Verification Step
A security prompt will appear. Complete the identity verification to proceed.
12. You're All Set!
Once verified, the recurring batch will be scheduled. It will automatically initiate on the chosen start date and continue based on the frequency you selected until the end date (if one was set). Click ‘Done’ to return to the ACH menu.

13. Identify Recurring Batches Easily
On the ACH menu, recurring batches will now display a Recurring Identifier next to them.