
Creating a New Deposit
To begin scanning checks and creating a deposit in Remote Deposit Complete, follow the steps below.
Step 1: Start a New Deposit
From the Open Deposits page, select Create New Deposit.
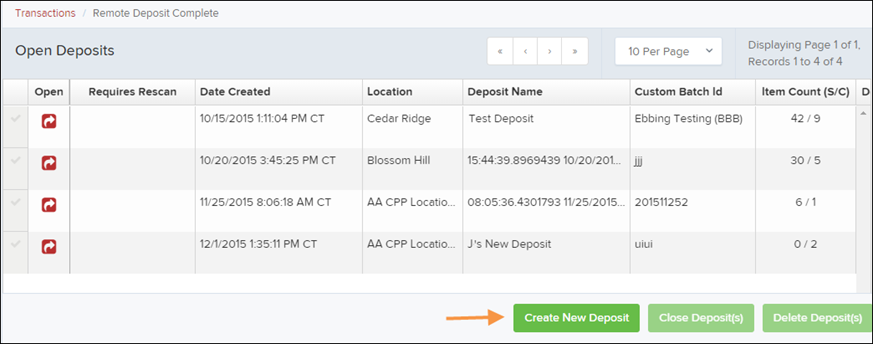
If Device Control has not already started, the system will prompt you to launch it before continuing. Follow the instructions on the screen to start the scanner connection.
Once this is complete, the New Deposit page will appear.
Step 2: Complete the Deposit Information
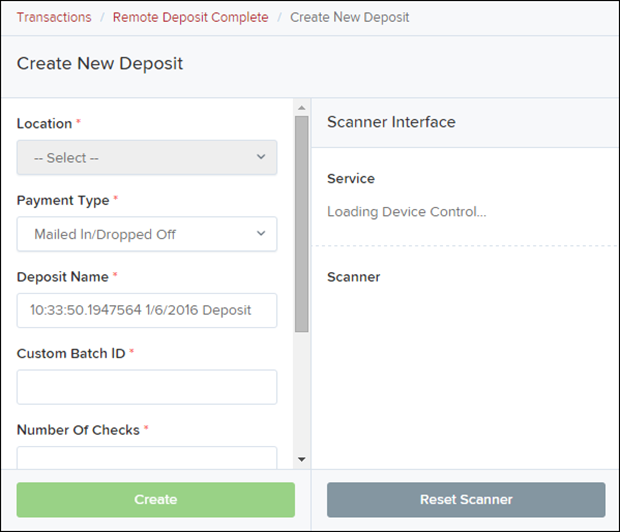
On the New Deposit page, enter the required deposit information.
Location
Select the account where the deposit will be processed.Payment Type
Select how the check was received (for example, Mailed In).Deposit Name
This field is automatically created by the system. It includes the date and time the deposit is created along with a unique batch ID.Custom Batch ID
If this field appears, enter a unique value for the deposit. This number cannot be reused.Number of Checks
Enter the total number of checks included in the deposit.Total Amount
Enter the total dollar amount of all checks in the deposit. This field must include two decimal places.
Example: XX.XXDeposit Slip ID #
If displayed, enter the deposit slip ID assigned to your organization.Scanner Terminal #
This field automatically fills in based on the connected scanner.
Scanner Connection
In the Scanner Interface section of the page, the system will automatically check for a connected scanner.
If the scanner is not detected:
Plug in the scanner.
Select Reset Scanner so the system can detect the device.
Scanning Your Checks
How you scan checks will depend on the type of scanner you are using.
Multi-Feed Scanner
Load the checks into the scanner.
Select Create.
The Deposit View page will appear and the checks will begin scanning automatically.
Single-Feed Scanner
Select Create.
Feed each check into the scanner one at a time.
The scanned checks will appear on the Deposit View page as they are processed.