
The Deposit View Page
Once Remote Deposit Complete (RDC) and your scanner begin scanning checks, the results will appear on the Deposit View page. This page allows you to review and manage your deposit before submitting it for processing. It is one of the two main pages used to review and prepare your deposit.
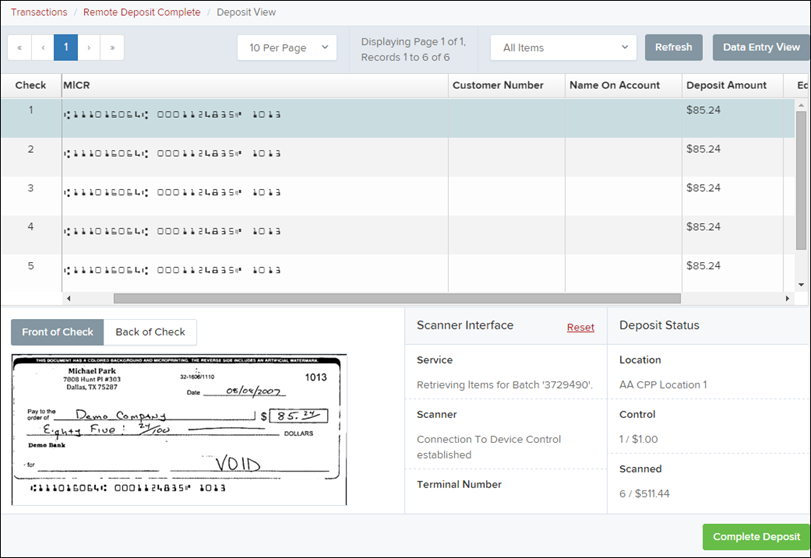
NOTE: If you see red question marks or yellow highlighted areas, this may mean the system had difficulty reading the check’s MICR line (the numbers at the bottom of the check). It may also indicate that information needs to be entered manually. Any additional verification or MICR repair will take place after the deposit is submitted for processing.
Features Available on the Deposit View Page
Once a deposit has been opened, the following tools are available under the Deposit View tab.
Refresh
If the check amounts do not immediately appear, select Refresh to update the page and display the values.

Multiple Customer Data
If the system detects repeated customer information from checks in the deposit, the Customer Number column may display Multiple.
Double-clicking Multiple will take you to the Data Entry View page, where you can review and update the information if needed.

Item List Filter
The Item List Filter helps organize the checks in your deposit so you can easily find items that may need attention. You can filter by:
All Items
Problematic Items
Needs Attention Items

Amount Status: “To Be Keyed”
If a check shows To Be Keyed in the amount field, it means the amount will be entered later by the processing team after the deposit has been submitted.
Edit, Delete, and Rescan Options
Scroll to the right of the check list to see additional options for each item:
Edit
Delete
Rescan
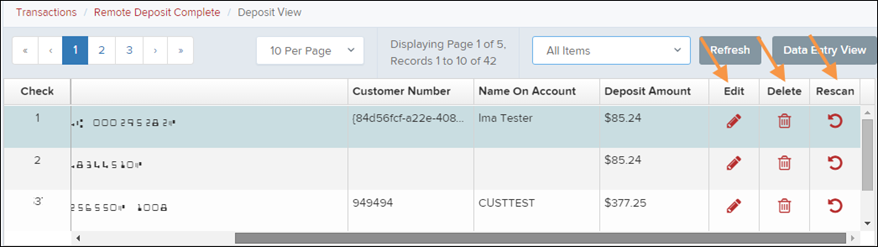
Selecting Edit will take you to the Data Entry View page where you can update check details.
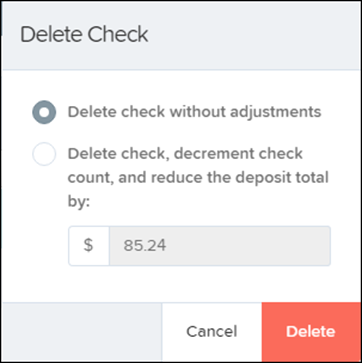
Selecting Delete allows you to remove the item from the deposit and adjust the deposit total.
Invalid MICR or Rescan Required
The system may display indicators if there is an issue with the check scan or the MICR line.
Invalid MICR Indicator – The system could not properly read the MICR line.
Rescan Required Indicator – The scanned image quality is not sufficient.

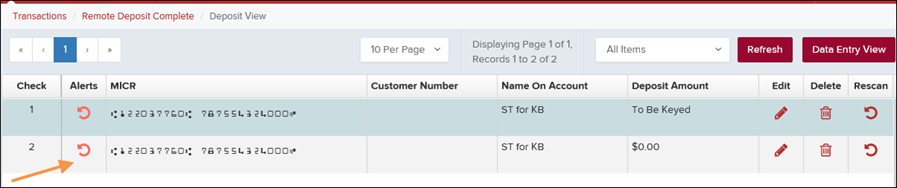
To fix this issue, the check must be scanned again.
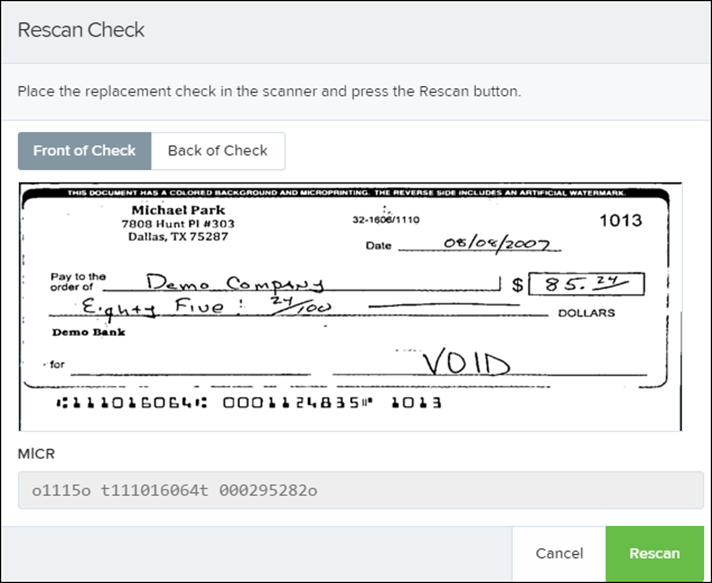
Rescanning a Check
To rescan a check:
Select Rescan next to the item that needs to be rescanned.
A rescan window will appear.
Place the check in the scanner.
Select Rescan in the window.
The check will be scanned again and the updated image will replace the previous one.
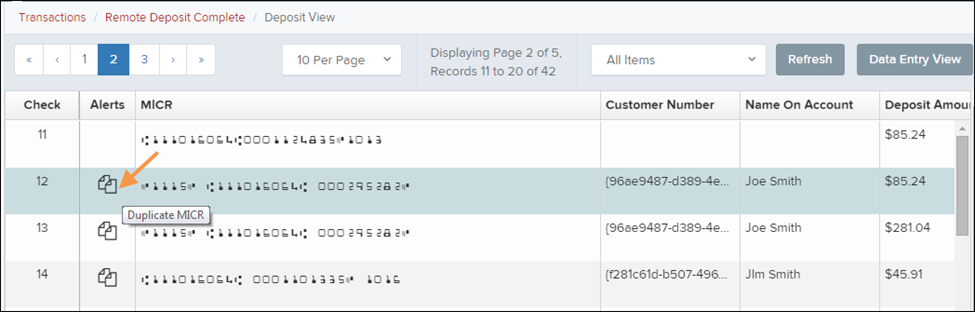
Alerts
If a check has already been scanned previously, the system may identify it as a duplicate. Duplicate checks will not be submitted for processing.
An alert icon may also appear if the system detects an invalid MICR line.

Viewing Check Images
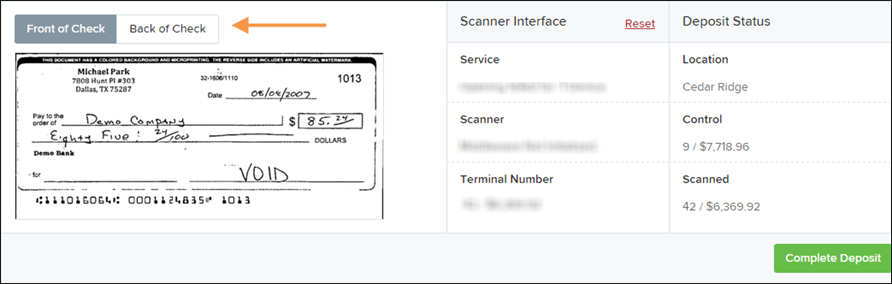
You can view the images captured by your scanner directly on the Deposit View page.
Select Front of Check or Back of Check to switch between the front and back images of the check.
In the Deposit Status section of the page:
The Scanned field shows the number of checks that have been scanned so far.
The Total Amount will display once all checks in the deposit have been scanned.
NOTE: In the Scanner Interface section, the Terminal Number for the connected scanner will appear for reference.
Completing the Deposit
After all checks have been scanned and reviewed, select Complete Deposit at the bottom of the page to begin submitting the deposit for processing.
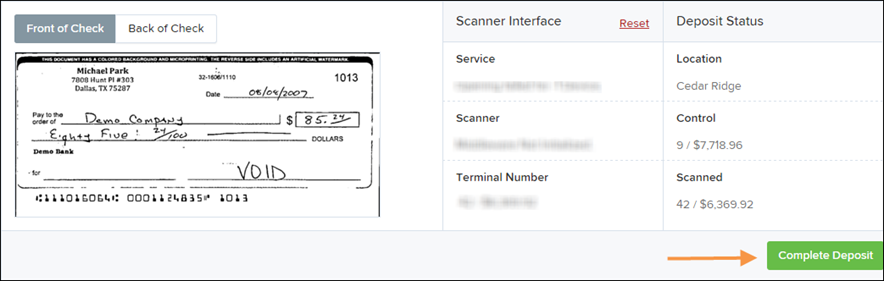
NOTE: It is recommended that you enter additional information for the deposit on the Data Entry View page before completing the deposit. The Complete Deposit option is available from both the Deposit View page and the Data Entry View page.
Data Entry View
To enter additional information about a customer or transaction, select Data Entry View near the top of the page.
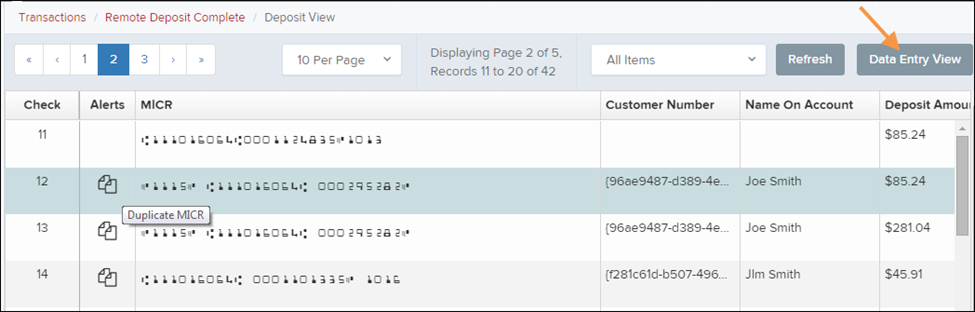
The Data Entry View page allows you to review or update information related to the checks in the deposit before submitting it for processing.